Sunday, November 28, 2010
feely boxes
I use feely boxes for science and math activities. I got this idea from Terri, a fabulous Kindergarten teacher who made her version of a feely box when she was in college. After closely examining her design I am sharing it with you.
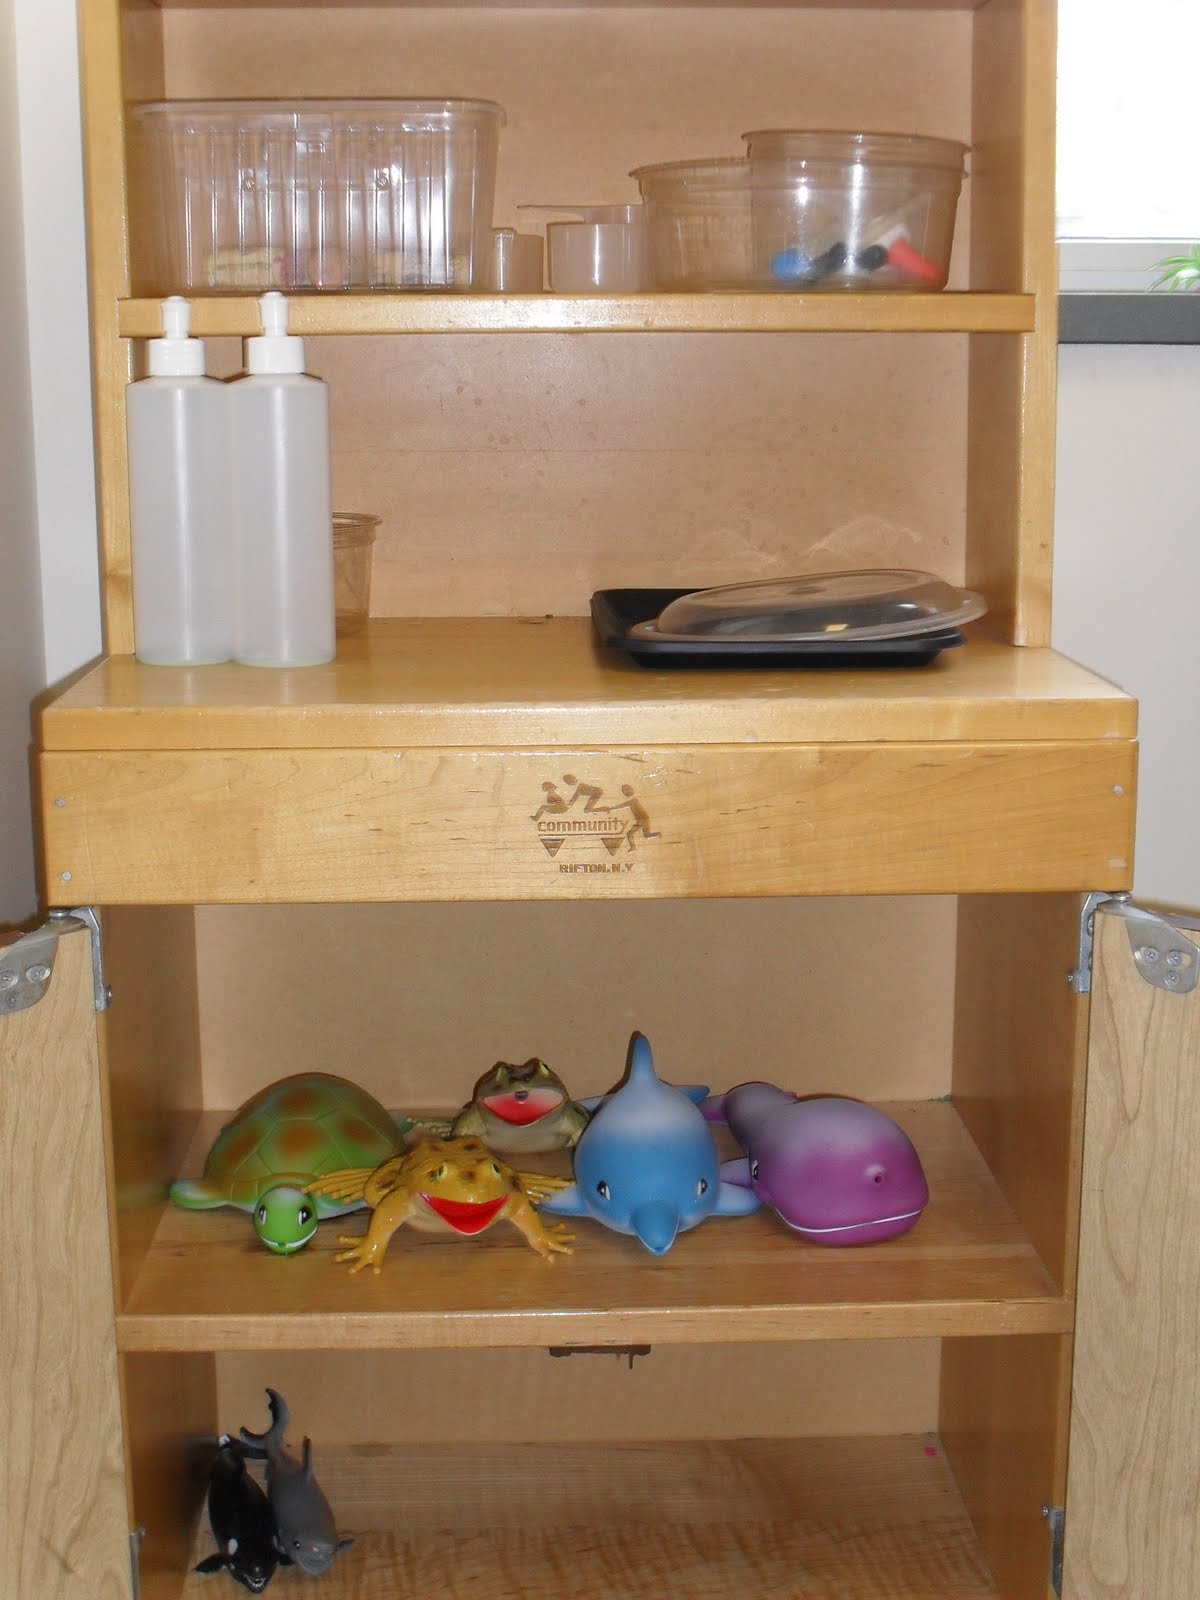
First you need a cylindrical shaped cardboard or plastic container. It should be large enough to accommodate a hand and the objects you want your students to feel. I like the size of oatmeal containers.
Reinforce and decorate the container with contact paper.
Find a fun, stretchy sock and cut off the toe. I used a pinking sheers to prevent unraveling.
Finally, hot glue (or use E6000 glue available at fabric and craft stores) to attach the sock around the lip of the container. (Terri stapled her sock on but I couldn't figure out how to make that work.) The students put their hand in the sock to feel the objects inside. I made several so that I can use them with pairs of students. Simple, elegant and earth friendly.
Wednesday, November 17, 2010
Tube Owls
Monday, November 15, 2010
Patterning stations
Thursday, November 11, 2010
Water Painting
I saw a version of this activity at our local children's museum. All you need is a few old paint brushes and a bucket with about an inch of water. My students love to paint the sidewalk and watch their picture disappear, only to paint new ones.
Wednesday, November 10, 2010
Scarecrows
Tuesday, May 11, 2010
May Basket
I think this is my favorite hand print project of the year!
This is a double hand print in brown, thumbs pointing up. Hands should be placed so that the fingers are intertwined. Use the finger paint technique to connect the handle of the basket with brown paint.
Students then finger print paint the flowers into the basket.
Happy May Day!
Sunday, April 25, 2010
A shout out to Dr. Jean!
Check out Dr. Jean's March '10 on her web page. She shares numerous ways to use recycled materials in the classroom. Together we can make a big difference is caring for our earth!
http://www.drjean.org
Free Stickers!
If you are like me, you have an over abundance of address labels sent to you by charitable organizations soliciting donations. I have so many that I have them sorted by month and more come every week! I decided to cut the picture portion off each label and use them as small stickers for sticker charts. This is a wonderful way to recycle unwanted and unsolicited labels!
Umbrella handprints
Ocean unit - informational text
The ocean unit is an excellent unit for using informational text. We used a set of books published by Scholastic about the different zones of the ocean and animals that live in those zones. I am unable to show a photo of the books we used because of copyright laws, however, Scholastic Book Wizard is located at the bottom of this blog and can be used to search for these books. ( I do not receive anything from Scholastic, I just really like the company.)
I used the table of contents with my students to chose which animal to read about first and to model that these books don't have to be read in order.
After reading about each zone, we listed all the animals that live in that zone on a large piece of chart paper.
Each student received an index card to illustrate an interesting animal from that zone.
The students then glued their pictures to the poster near the name of their animal. We displayed our posters in the hallway.
We also used Dr. Jean's song called Oceans on her Sing to Learn CD. You can download a printable book to go with the song on http://www.drjean.org The song is sung to the tune of "My Bonnie Lies Over the Ocean" and can be used without the CD.
I used the table of contents with my students to chose which animal to read about first and to model that these books don't have to be read in order.
Ocean arts and crafts
The hand print crab is another fun ocean craft. While the students are working on something else, I call them one at a time to the art table. The students choose the color they want and I paint both their hands and place them, finger spread apart and facing out, thumbs up, on the paper. When the paint is dry the students add eyes, claws and other ocean scenery. I like how they reflect student's individuality.
The ocean display bulletin board showcases much of our work. The star fish and snorkel masks came from black line masters that the children colored. The eye mask of the snorkel shows the ocean animals the child would most like to see and was part of a journal activity.
Ocean
In honor of our ocean unit I created this mini ocean/water table as a dramatic play area.
I used a large plastic storage box and filled it with about 3 inches of water. This is enough water to play with but not so much that it is easy to splash it out of the container. I used food coloring to dye the water blue.
I taped bubble wrap around the desks that hold the water table to help minimize spilled water and to make the area more thematic.
Saturday, March 20, 2010
Shamrock Handprints
The hand print project for March is this festive green shamrock. After painting the child's hand green, I stamp the hand 3 times, fingers pointing toward the center of the paper, creating the leaves. The teacher or student can add the stem.
We created the project quilt by alternating the shamrocks and tube leprechauns.
Animal Hospital
Children love animals and they love pretending. I created the animal hospital so that they could practice being veterinarians. This area includes an office desk complete with post it notes and animal themed papers, because every office has forms to fill out.
The animals in this hospital include puppies, kittens, monkeys, birds, fish and rabbits.
Q and U's Wedding
A wedding between letters Q and U helps reinforce these two and partners in words. It is a fun celebration with a literacy twist. Here are some ways we celebrate in my class.
The big Q and U are all dressed up and ready. Q's wedding veil is made of tulle that I found at thrift store.
I copied picture cards of words that start with /qu/ like: question mark, queen, quail, quilt and quarter. The gift boxes are CD gift boxes. I put enough pictures in each box so that each child could have a copy. As the gifts were opened, each child received one that he/she later glued to a Just Married paper, shown in the picture.
The girls made veils with sentence strips and real tulle. A little tulle goes a long way!(I learned the hard way that the veils should only be shoulder length, or they will get stepped on.) The boys made bow ties with tissue paper and clipped them onto their shirts with clothes pins. We had a real ring pillow and used plastic champagne glasses for the reception of milk and cookies.
Dazzlers
After the big 100th day celebration, Zero the Hero stops visiting and numbers ending is zero lose some of their enticement. I had the student make dazzlers on the 110th day of school to remind them that they are getting dazzlingly smarter every day!
We used clean baby food jars, added sticky back pictures, confetti and glitter. Then we placed the top on securely and shook them up. Dazzling!
I showed the students that when they brought the dazzler home, they could fill it with water for more shaking fun. They were encouraged to ask an adult to check that the top was on tight!
We used clean baby food jars, added sticky back pictures, confetti and glitter. Then we placed the top on securely and shook them up. Dazzling!
Sunday, February 28, 2010
I will follow Jesus
Thursday, February 18, 2010
George Washington Portrait
In honor of President's Day we talk about the different presidents especially noting the observable differences between our 1st president and our current president. We talk about portraits and photographs and illustrate our learning by creating a portrait of George Washington.
Each student traces and cuts out a circle on a white piece of paper and glues it to a base piece of construction paper. A face is then added to the circle.
SWAK
This is a fun idea for a Valentine card for Moms and Dads. First create a boarder on a sheet of construction paper with a pattern xoxo (hugs and kisses.)
Then create a lips stamp by filling a ziplock bag part way with water. Dip the bottom in paint and stamp onto the paper. The seem on the bag will create the defining line on the lips.
Friday, February 5, 2010
February Quilt
The hand print quilt project for February is a heart shape using both hands to create the print.
Below the heart we included a heart themed poem.
Another project is a modification of the heart person. We used 2 cardboard tubes that I previously glued together. Each student cut out 2 hearts and glued one to the front of the tubes and one to the back of the tubes.
We folded 4 strips of paper accordion style and attached them to the tubes as arms and legs.
Subscribe to:
Posts (Atom)